
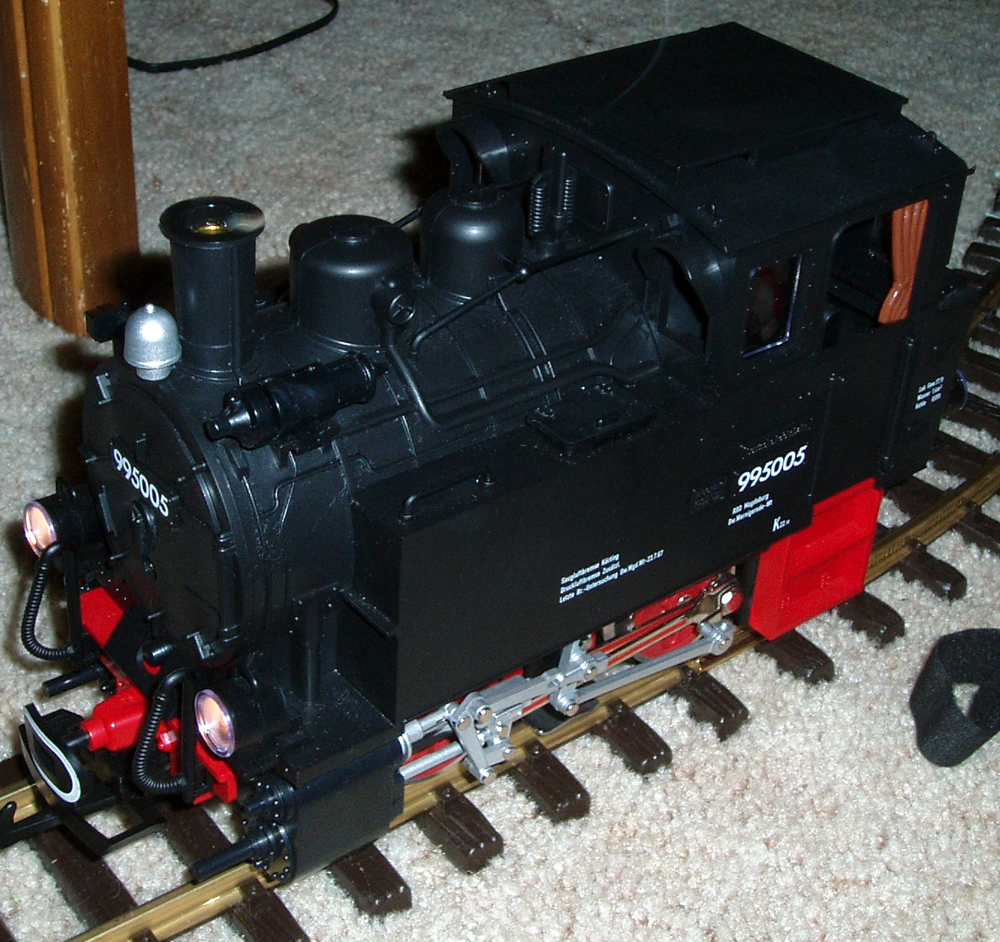
Here she is, the steam locomotive from the LGB MTS Starter Kit.
But, what's a great G-Scale loco, if it makes no sound?
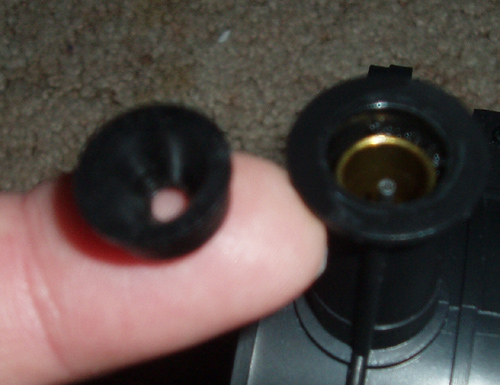
This shot is here for Joe @ LGB. There was some question as to whether to remove the small funnel-like insert in the top of the stack. It doesn't make any smoke with it in there, and a bit with it out... so here's what I'm talking about Joe.
Disassembly. Here are the screws, one on each side. They're a little hard to get at, but a small Phillips will get them out.
Also, in the upper right of the picture, you can see where I installed the small toggle switch for the sound volume.
Here is our lovely little friend, in all it's glory, with just a hint of smoke wafting from the stack (it has a problem).
After the two screws, the only thing holding the top on, is a small spring-loaded plastic tab in the front.
Dead center of the front, right below the boiler front, is what looks like a little round peg... push it in, and pull up on the top half of the loco. Careful of the wires... there are many.
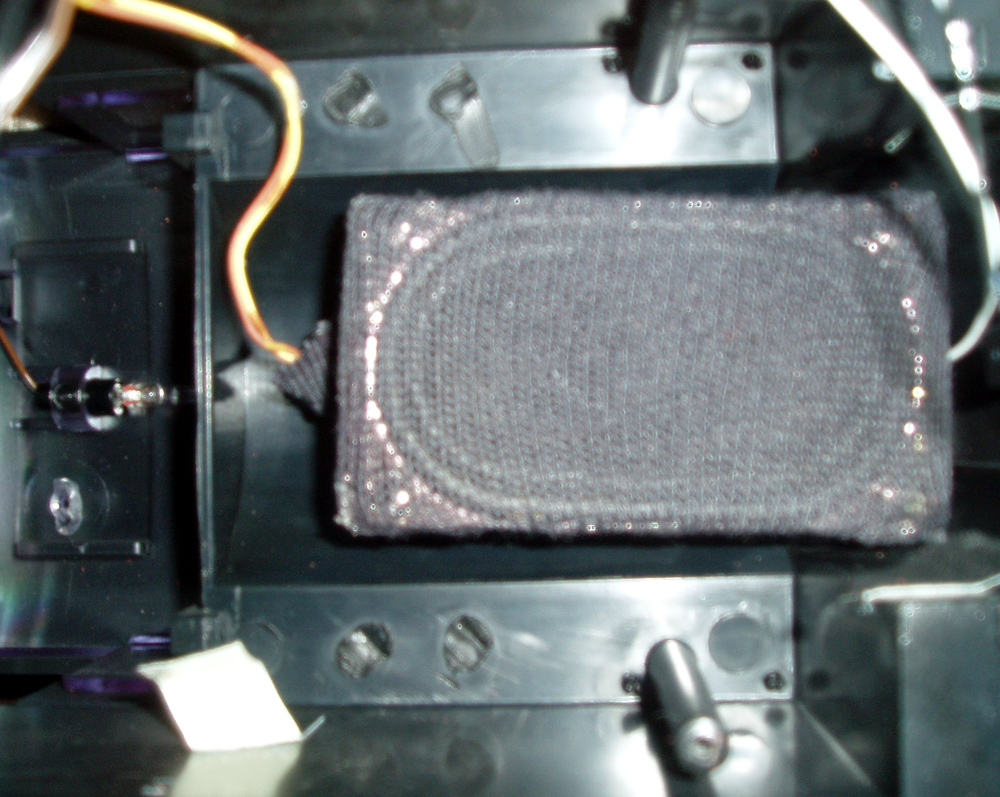
The speaker I chose, is a little rectangular one, as you can see here. What you're looking at, is the inside the roof of the front boiler... the speaker in fact, once everything is back together, is facing down.
DO NOT just drop it in there. This one, has a stiff cardboard box built around the back of it, to enclose it properly and give the cone something to push against. An almost sealed box, is the only way to properly mount a speaker, and this one needs one. Don't believe me? Get some sound going through one of these, and then just cup your hand as a box behind it, sealing up to the edges... you'll instantly hear the difference.
Anyhow, speaker in top of boiler, facing down. Wires dangling from it.
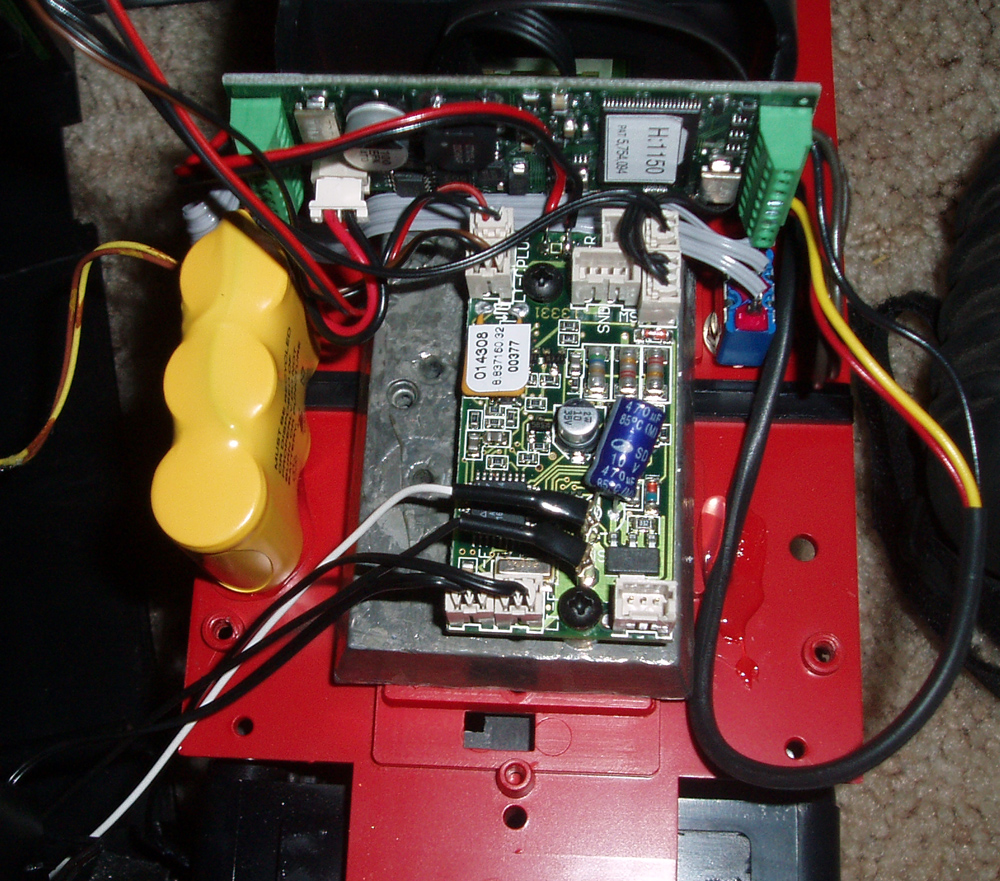
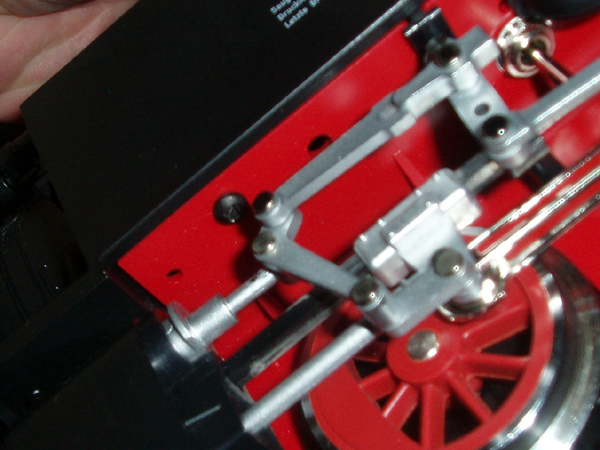
Ok, now on to the 'gist of the rest of it. Those leads at the front, are lights, and the smoker. (factory wires)
Right at the back of the main factory board, dead centre, you can see where I soldered red and black wires on, to get power for the sound board. These two solder pads are directly connected to the track pickups, so they are ideal.
The battery is just hot-melt glued down as you see it, making sure to clear standoffs in the boiler top.
The wires all go to the correct terminals on the sound board, and then it just dropped down vertically behind the factory decoder board.
A bit of hot melt glue on the bottom edge, and on the back next to the firewall, keeps it from moving.
You'll have to double-check clearances, but it wasn't that hard...
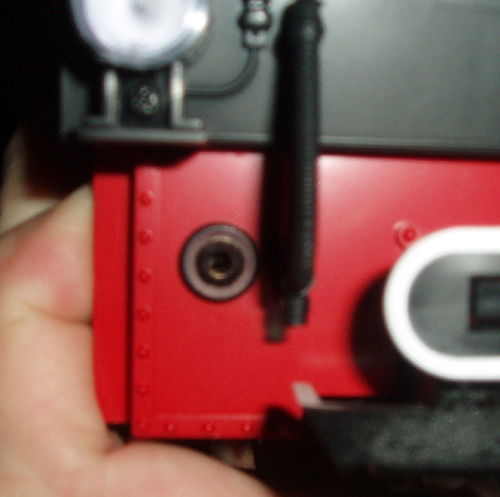
Here is where I put the PC communications jack... on the rear bumper, and coloured it with a black sharpie marker. (just so it wouldn't stand out)
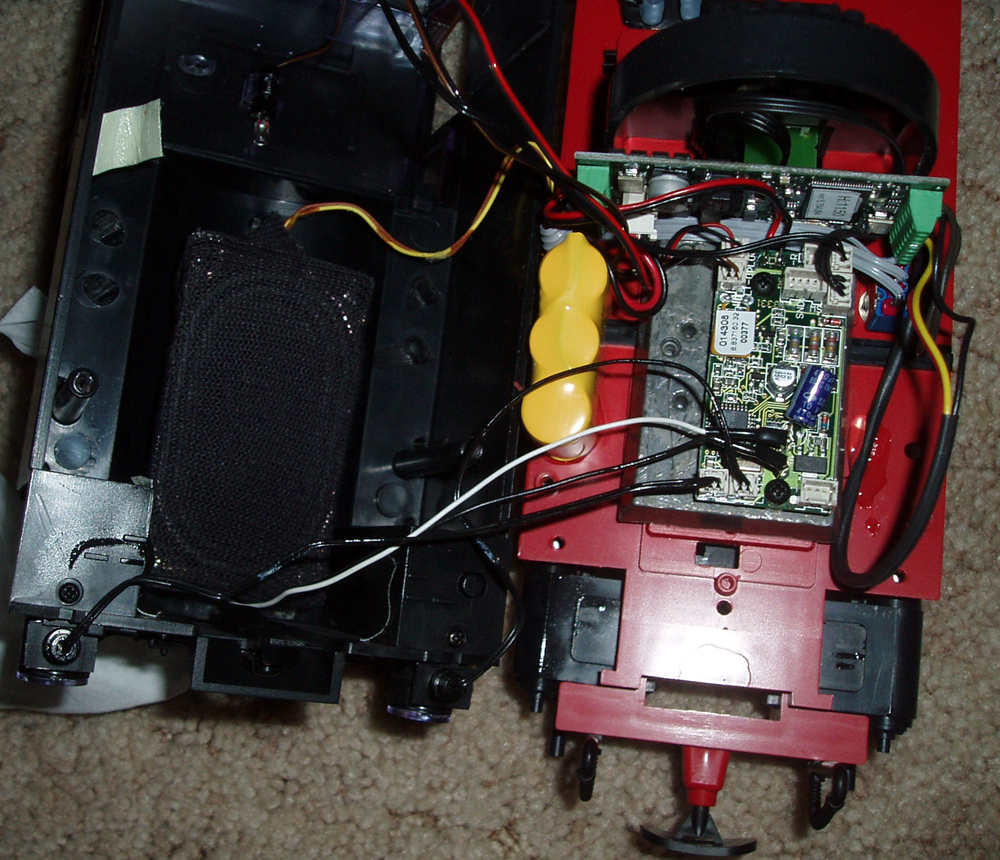
Overall, before re-assembly, this is what it looks like. Be careful that extra wire loops don't push into the speaker cone during assembly, or you could get vibration or damage. (part of my personal reason for covering the speaker box I made with cloth -- from an old cotton dress sock)
When done, I downloaded my choice of sound into it, configured it, and off she went down the track, chuffing and puffing.
The sound, given that the speaker is not exposed, is surprisingly good.
Any questions? Feel free to email me. andrew [at] bienhaus [dot] org.
Last Updated: 2015-11-25 11:02:21 AM -0500